05.A. How to Use Answer Entry/Verification
The Answer entry/Verification tool is an interactive data table that holds all assessment data. The rows in the table represent the selected students while each column represents each question included on the selected assessment. This tool can be used to manually enter student assessment data, but it also provides a destination for teachers to verify assessment data that has arrived in eDoctrina from one of the many ways available.
Verification after scanning student answer sheets if often required as it is difficult to predict how students fill in the bubbles on answer sheets. This tool provides teachers the opportunity to take a second look at any questions where a student left an answer blank, selected more than one answer, and/or provide a score for any "Teacher Scored" questions.
Navigation
The Answer entry/Verification tool is accessible from the Teacher Dashboard, which can be accessed by clicking the option under the "Qucik Links" pull-down in the navigation menu.

In the Teacher Dashboard, use "Select students" filters to select the students to be included. Please note that the "Course" and "Class" are the only required selections, while the "Select Student(s)" pull-down will automatically populate with the students enrolled in the selected classes. The "Select Student(s)" option should only be used to select an individual student or group of students.
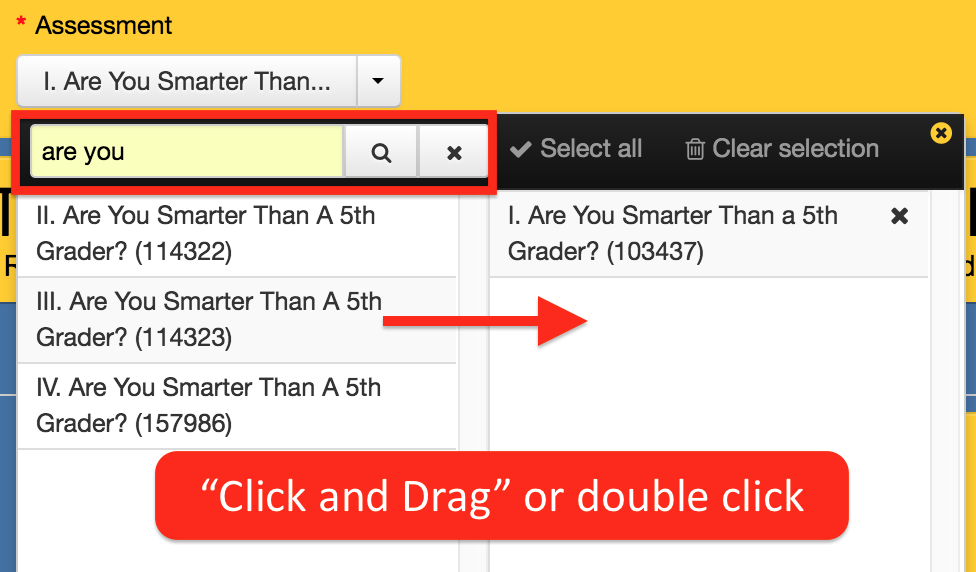
Manipulate the second row of filters to locate the desired assessment. The list of assessments can be rather extensive and it is often helpful to type the assessment ID, name, or affiliated "tags" in the search bar to easily locate the desired assessment.


NOTE: Only one assessment can be selected when using this tool.
When the appropriate students and assessment have been located, click the "Check Student Answers" button to open the "Answer entry/verification" screen.

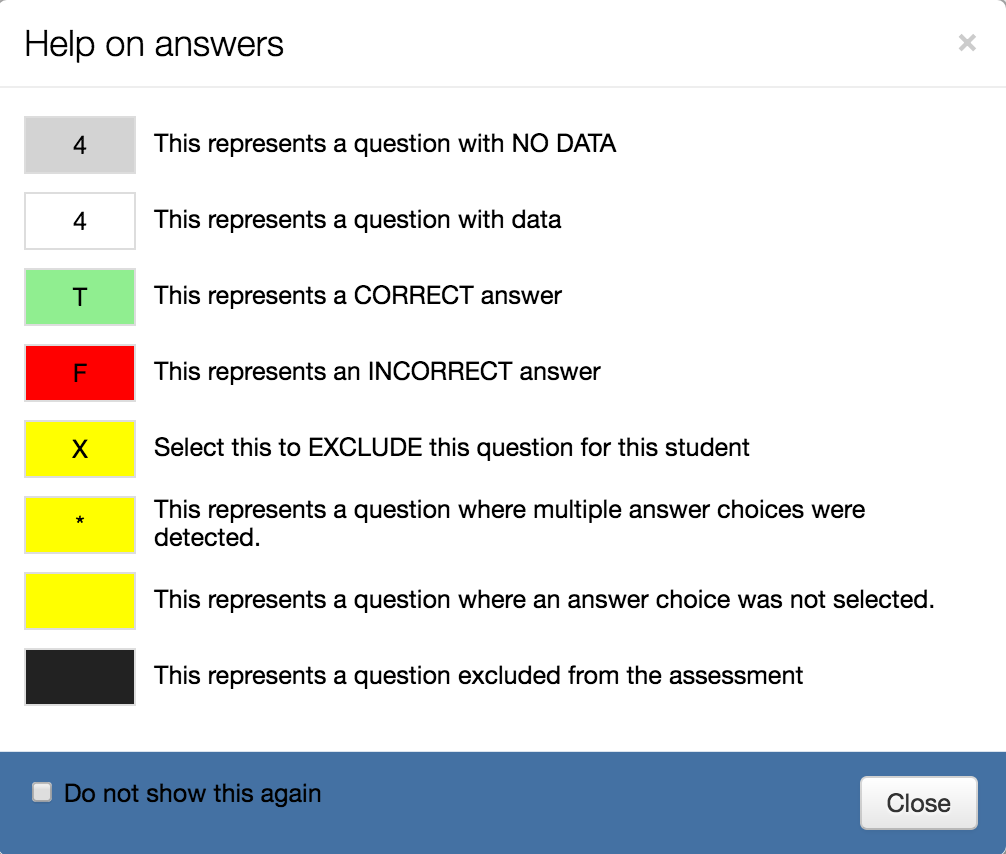
- This portion represents all of the data that has been recorded for the selected student(s) and assessment. Looking at the color representations can often provide some immediate insight on how a student has responded to the questions included on the assessment. A color key is available by clicking the
 button in the top right of the screen.

NOTE: Click here for more information about the color schemes. - This column contains the current percentage of the points earned for each student on the selected assessmnet. It also serves as a hyperlink to the Individual Student Report. If any changes have been made to student responses, please save and refresh the page to display the most recent percent. Please note that the displayed percentage will not consider any special weighting if it has been applied to the selected assessment. Hover over the percentage to see a quick view on how the percentage is calculated.

- This column will display two different icons (if applicable):
-
 : The calendar icon will display if the assessment has been assigned to the student online. Hovering over the icon will display when the student first accessed the assessment and when they finished the assessment.

-
 : The image icon will display if there has been an answer sheet scanned for this student. This is an extremely helpful resource because it allows the teacher to review answer sheets without carrying around a stack of papers. Click on the icon to view the image

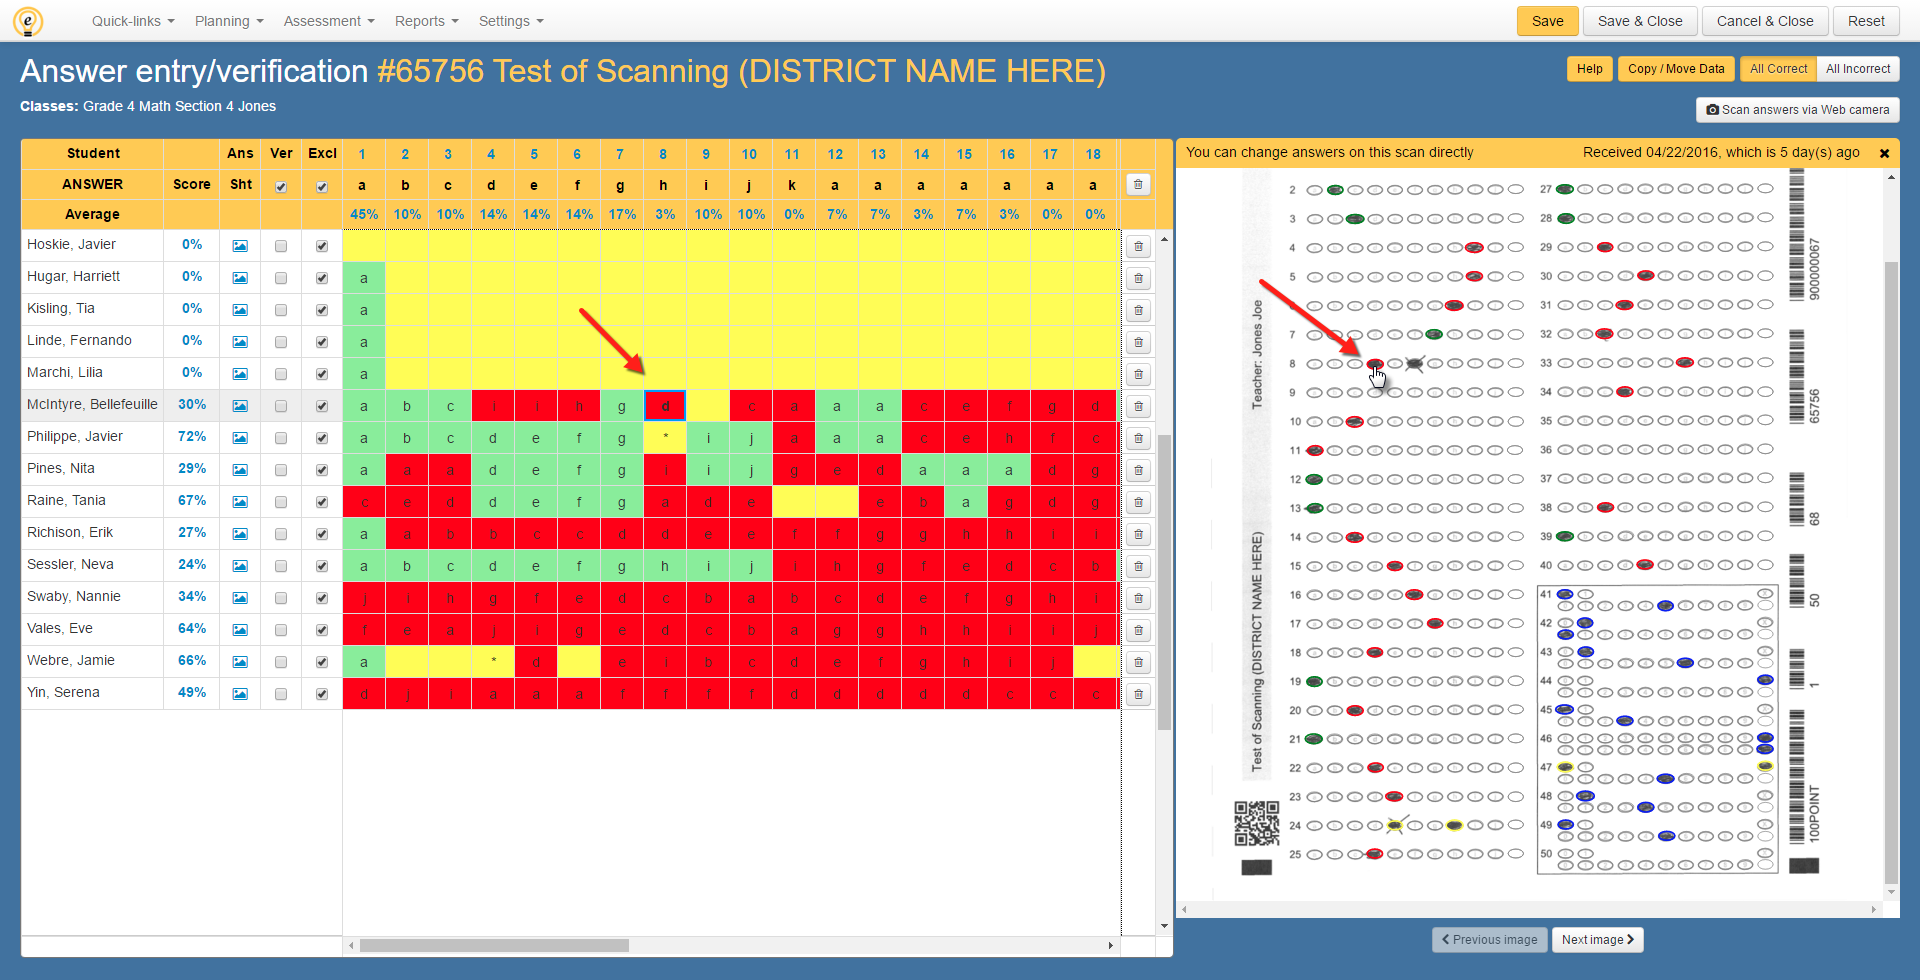
(2) Here are the two questions where the student response were not recorded. Question 8 clearly shows the student initially bubbled in F but then crossed it out and changed their answer to D. Question 9 has no answers selected.
(3) Bubbles highlighted in GREEN are correct answers.
(4) Bubbles highlighted in RED are incorrect answers.
(5) Bubbles highlighted in BLUE are Teacher Scored answers.
To adjust the answer for question 8, all you have to do is click on the bubble the student meant to select, so in this case, answer D:
NOTE: The changes will be reflected immediately on the verification side of the screen for that particular question.
-
- The verification box will need to be checked if a teacher has verified that they are leaving a yellow (invalid) answer uncorrected for a student. For example, if Johnny left a question blank on the answer sheet it would scan in to eDoctrina as a yellow box on the Answer Entry screen. The teacher would have two options… (1) to conference with the student to get an answer and fix it in Answer Entry or (2) leave the answer as blank because it was the students error. If the teacher chooses option 1, the teacher fixes the mistake and does not worry about the “Ver” box, if the teacher chooses option 2 then they would click the “Ver” checkbox to verify that that they have approved the mistakes on the answer sheet.
- The "Excl" checkbox is relevant to students that currently have no data (cells with gray background) for one or more questions. This is a great tool to quickly enter "All Correct" responses or "All Incorrect" responses to avoid having to click on each question individually. If "unchecked" with gray cells still remaining, the teacher will receive the following pop-up message prompting them to decide "What they would like to do for the questions they did not change?"

NOTE: If any change has been made to a students responses and there are still remaining cells with no data, the "Excl" checkbox will automatically "uncheck".
In regards to the remaining gray boxes, the teacher will have the option to "Leave them as unanswered" or "Assign the correct/incorrect answers to the student". The latter option depends on what is selected in the top-right corner of the screen.
- This row will list all of the question numbers. If applicable, clicking on the hyperlink will display the learning standards that have been attached to each question.
- This percentage is the current percentage of the points earned for each student. It also serves as a hyperlink to the Item Analysis Report. This report will provide ,along with a lot of other information, a graphical display of how students have responded to this question specifically. Hover over the percentage to see a quick view on how the percentage is calculated.
- The
 button next to a specific student will remove the existing assessment data for that student. Please note that this action is final, but will not be saved unless the teacher clicks the "Save" or "Save & Close" button. If the
  in the column header is selected, it will remove the assessment data for all included students. Unlike the removing individual student responses, using this button will result in a pop-up window asking if the scanned images should be removed as well.

NOTE: It is difficult to recover images after they have been removed, so please remove images only if it is planned to rescan the answer sheets.
After the is selected, it will update to a
  button, which will allow the user to restore the removed data and will ONLY be available until the teacher saves the most recent changes.
 - Help: Clicking the help button will generate a pop-up window containing a key explaining what all the colors mean.
The cells with a WHITE background and a "black triangle" in the top right corner indicate that the question is a Teacher Scored question. Clicking on the "black triangle" will open a pop-up window that allows the teacher to view student responses that have been entered online. If applicable, this pop-up window will provide the option to view any scoring guides or rubrics attached to the question.

Select the  button to view any attached rubrics or scoring guides.

A pop-up will appear containing two tabs to choose from: the scoring guide and rubric :

The earned points for the question can be entered by selecting them in the "Answer Points" pull-down. Teacher comments, which have the option to display on the Individual Student Report are entered here.

The answer verification screen is also a great place to enter scores manually. Teachers have the option click the appropriate box and a drop-down menu will display the options available. Click the appropriate response from the drop-down and it will show in the box (which is color-coded).

This page does not automatically save, so it is a good practice to click  at the top of the screen when any modification are made on the Answer Entry screen.
 Save as PDF