 Save as PDF
14.C.1. SLO Target Setting Options
"HEDI / Attainment Score based on..." Options
There are several options that control how SLO assessment scores are calculated based on the HEDI/Attainment Table.
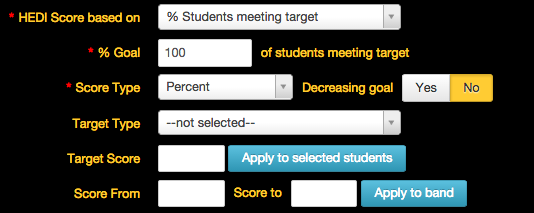
% Students meeting target
This is the default setting and is the most commonly used.
% Goal ___ of students meeting target
This is an optional setting that can be set to show/or not show when creating a SLO based on the district's SLO settings. This field would need to be formatted if teachers have written goals such as "45% of my students will meet their target." If it is assumed that 100% of students linked to the SLO are expected to meet the target, this option does not apply. **(If % goal is not 100 and is customized to another %, note that the HEDI table score will adjust accordingly.) This feature will not adjust the HEDI score UNLESS there is a setting that is enabled on the back-end for your district.
Average on final assessments
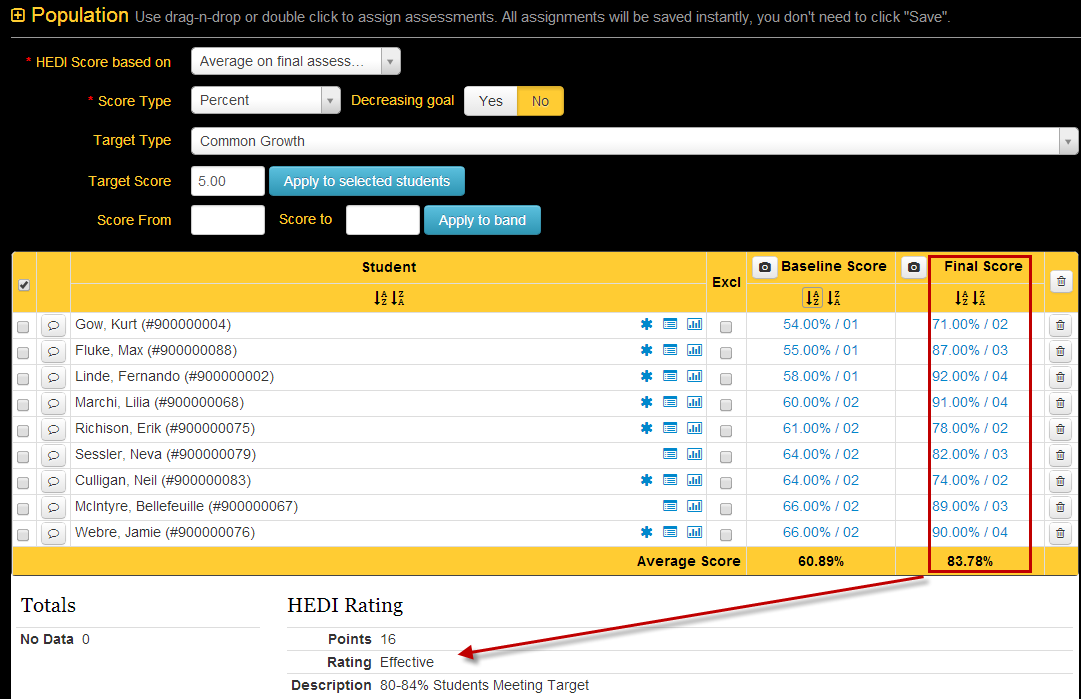
This option uses the average of the student's evidence assessment scores to calculate the HEDI table rating.
Average growth from baseline to final
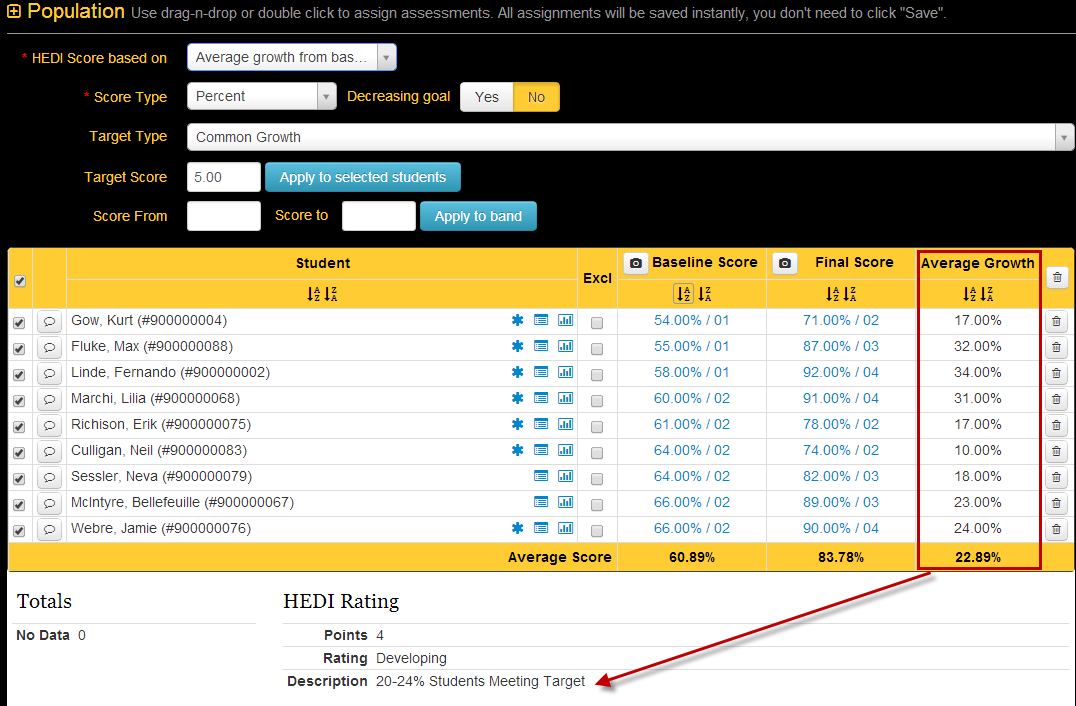
This option uses the average growth the students made from their baseline to final scores to calculate the HEDI table rating.
Average % gap closed
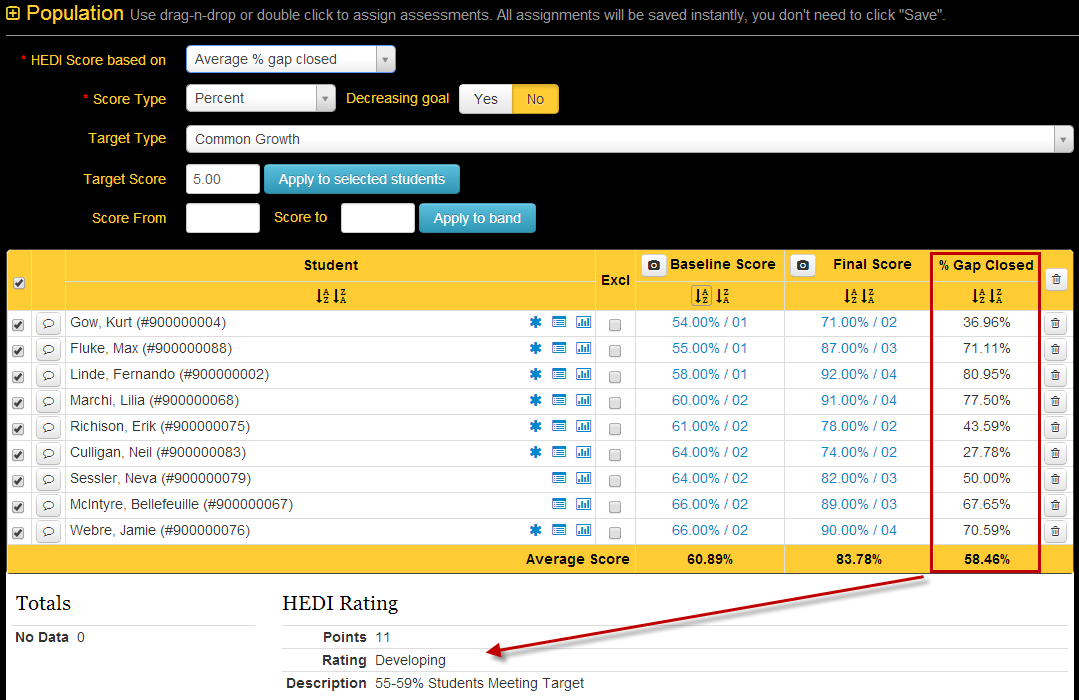
This option uses the % gap closed average to calculate the HEDI table rating.
Average Achieved
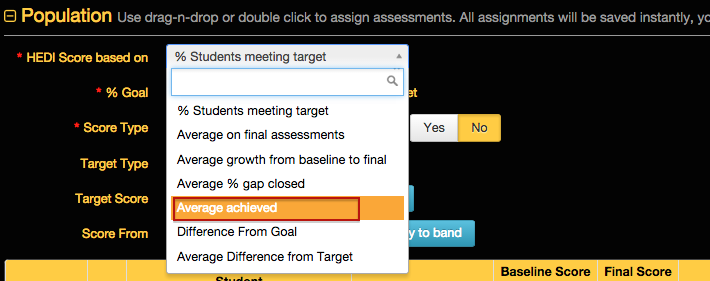 This option is designed for users who have multi-point targets. For example, students could earn .25 if they met "Target A", they could earn .5 if they met "Target B", etc. This takes the average of all targets achieved.
Difference From Goal
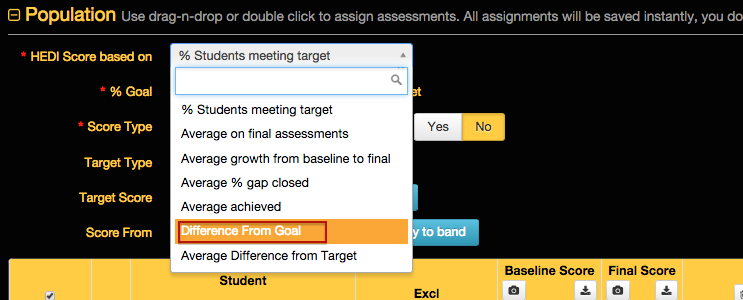 To utilize this option, users have to put a value in "% goal ____ of students meeting target" box. This then calculates the % of students who met the target and and subtracts "% goal" from this number to find HEDI score.
Average Difference From Target
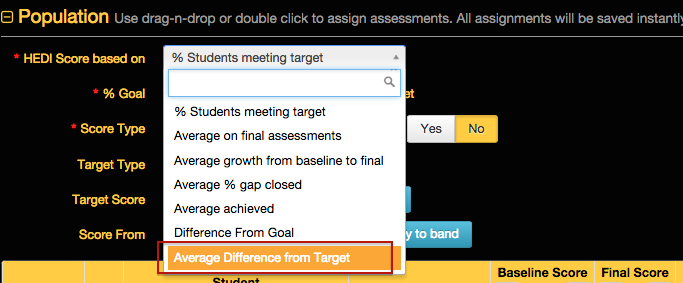 This option changes the last column (Target Achieved) of saying "yes/no" to reflect the difference from the students final score to their target score. This number could be negative or positive, it takes the average of all students for that column and calculates HEDI score.
Score Type
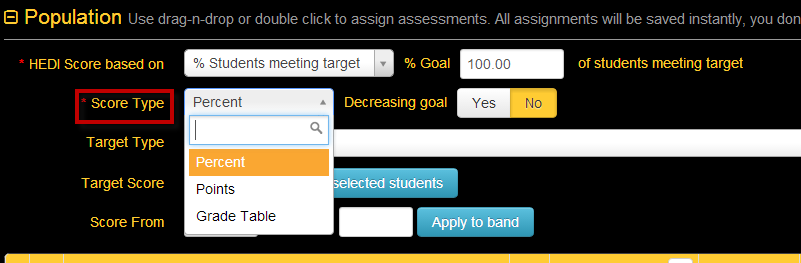
Percent
Selecting this score type will set goals based on the student's percentage shown in the Baseline Score column (ex. 5/10 would be 50%). If scores are hand-entered in the Baseline Score column, eDoctrina will treat them as percentages.
Points
Selecting this score type will set goals based on the student's raw score shown in the Baseline Score column (ex. 5/10 would be 5). If scores are hand-entered in the Baseline Score column, eDoctrina will treat them as points, not percentages.
Grade Table
Selecting this score type will set goals based on the student's grade-table score shown in the Baseline Score column. This option does not apply to hand-entered scores.
Decreasing Goal Option
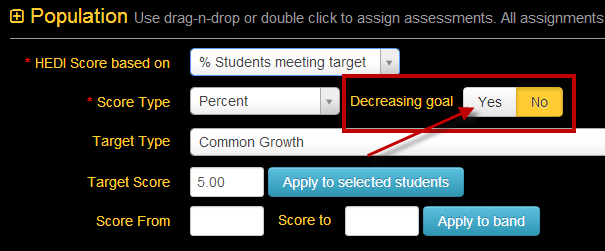
This option allows users to set targets for students when target values are smaller/lower than the baseline score. For example, if a student runs a mile in 10:24 minutes for their Baseline Score time, the target time may be set as 8:45. If the Final score time is 8:30 then the student will have met the target.
Target Type
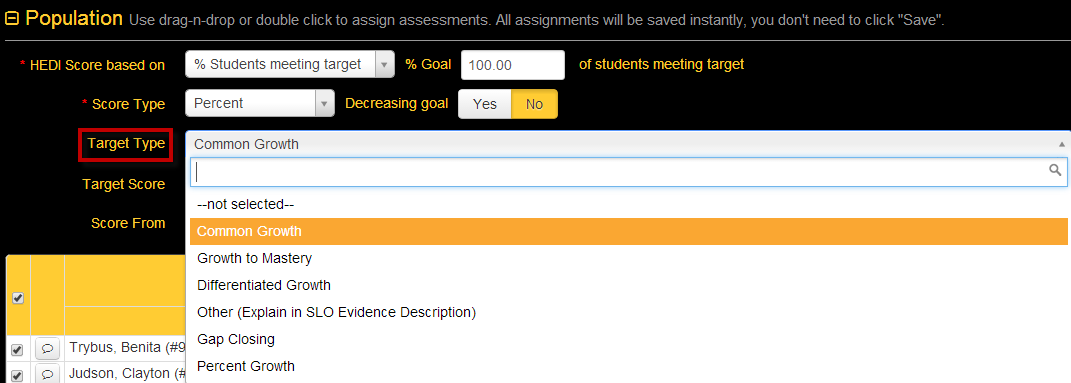
Common Growth
The same percentage or point value will be added to all selected students Baseline Scores. Select this option and enter the amount you want each student to grow by in the Target Score cell and then select the "Apply to Selected Students" button.
If using the Grade Table Score Type, enter the number of levels on the grade table you want the student to grow. So if you have 5 levels in the Grade Table and you want each student to "move up" 2 levels, enter 2 in the Target Score. Note that the value eDoctrina places in the Target Score column will be the minimum raw score needed to reach that target level.
Growth to Mastery
The same target will be set for all selected students, regardless of baseline scores. Select this option and enter the amount you want each student to achieve in the Target Score cell and then select the "Apply to Selected Students" button.
If using the Grade Table Score Type, enter the relative number of the level on the Grade Table you want the student to achieve. For example, if you had a Grade Table that contains 7 separate leves ("grades") and you wanted all students to achieve at least the 4th level, you would enter a 4 in the Target Score cell. Note that the value eDoctrina places in the Target Score column will be the minimum raw score needed to reach that target level.
Differentiated Growth
The user must manually enter a target for each student.
Note the Grade Table score type option should NOT be used with Differentiated Growth. If you want to base targets on a grade table, select the Points option and use the minimum scores required to reach a particular level in the grade table as the targets.
Other (Explain in SLO Evidence Description)
Same as differentiated growth.
Gap Closing
Only used with Percent values. This will close a certain percentage of the gap between the selected students’ baseline scores and 100%. For example, if you select Gap Closing and enter a value of 40% and a student had a baseline score of 20%, the target will be set at 52%, calculated as shown:
- Gap = 100% - baseline score = 100% - 20% = 80%
- Percent of Gap = Percent Increase x Gap = 40% x 80% = 32%
- Target = Baseline + Percent of Gap = 20% + 32% = 52%
Percent Growth
This will increase the selected students’ baseline scores by a certain percentage. For example, if a student had a baseline score of 50% and you selected Percentage Growth with a value of 25%, the target would be 62.5%, calculated as follows:
Note the Grade Table score type option should NOT be used with the Percent Growth option.
- Increase = Baseline Score x Percentage Growth = 50% X 25% = 12.5%
- Target = Baseline + Increase = 50% + 12.5% = 62.5%
Banded Scoring Tool
To use the banded scoring tool, you simply follow the steps above for goal setting, but instead of clicking on "Apply to selected students" button, enter the baseline score range in the SCORE FROM and SCORE TO spaces and select the "APPLY TO BAND" button.
