 Save as PDF
How to Create a Full Assessment w/Questions
Creating an assessment completely in eDoctrina — including writing new questions — is a straight-forward process.
1.Click the “Insert” (plus) button from the “Assessments” screen
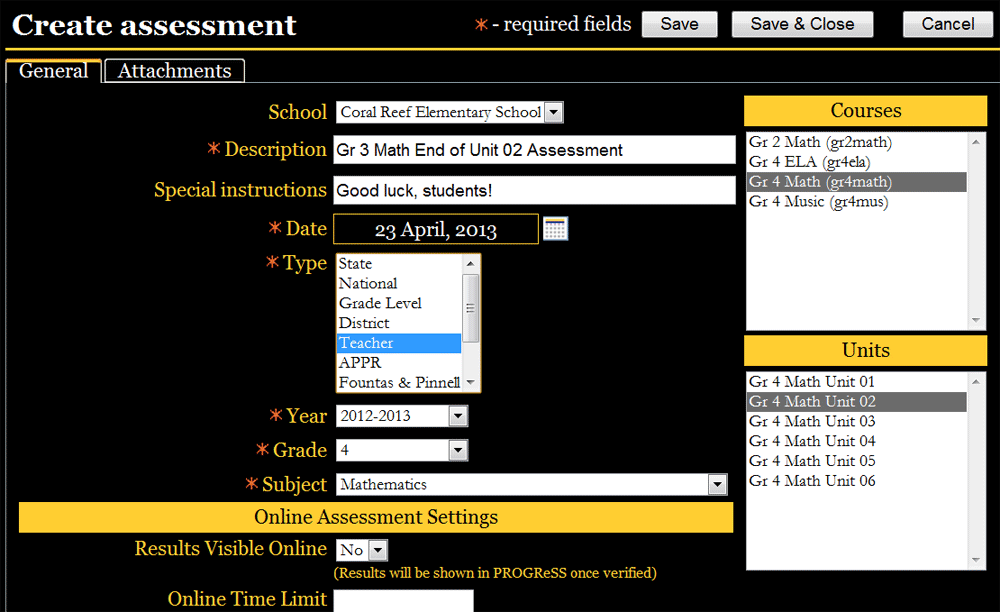
2.Enter the assessment’s general information on the “Create Assessment” screen (see above). Mandatory fields are denoted with a red star. “Description” would be the name of the assessment. The bottom of this screen includes a number of options for those schools/districts that use eDoctrina’s online assessments and standards-based report cards tools.
3.Courses and units can be linked to a particular assessment by selecting them from within the boxes located to the right of the screen. To choose one, simply click it. Multiple courses/units can be selected if desired using the "Shift" and/or "Ctrl" keys. When completed, click “Save.”
4.A number of new tabs are now viewable at the top of the page. Click the first, “Questions.”
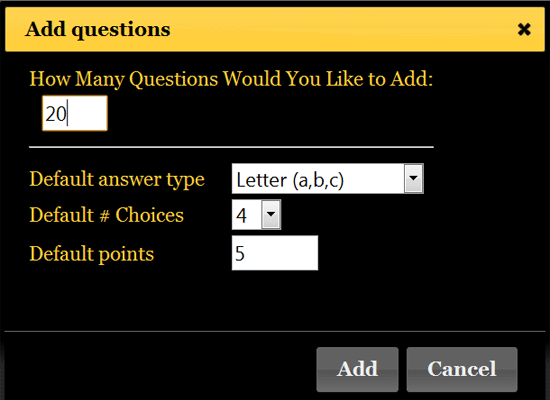
5.Click the “Add Questions” (plus) icon located at the screen’s upper left. This will produce a pop-up menu labeled “Add Questions” (see below). Here, users enter the number of questions on their assessment as well as the most-commonly used question type, the most common number of choices for each question, as well as the default point value of each question. Click “Add.”
6.Once the screen refreshes, users can scroll back up to question one and start to write that question. To do so, click the gold “plus” button located to the right of the white “Standards” box. This opens the “Create Question” screen (see below).
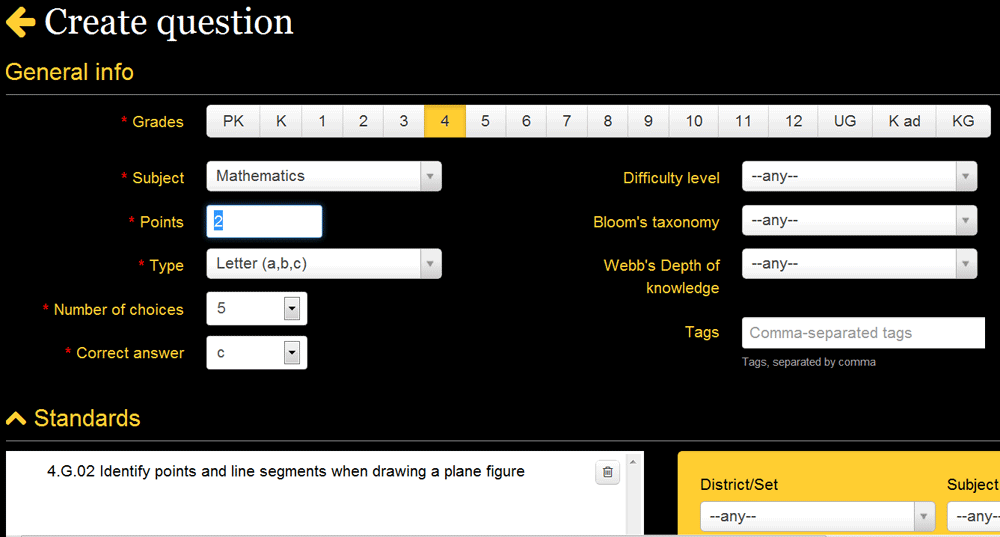
7.At the top, fill out the fields that describe the question, including the five mandatory fields (marked with a red star) — Subject, Points (value), Type, Correct Answer and Grade(s).
8.Users have the option of linking the question to standard(s) next or can scroll down to the “Question” interface to begin writing the question before managing standards. Learning standards can be located by manipulating the filters located within the gold box and simply dragging-and-dropping them from right to left (to the white box labeled “Standards”).
9.The “Question” interface (see below) offers users the flexibility to utilize different colors, font styles (bold, italics) and even import images. A powerful equation editor (“square root” icon) also exists here. Each answer (the number of interfaces corresponds to the number of responses that are needed) also uses the same interface, and, thus, can have similar properties.
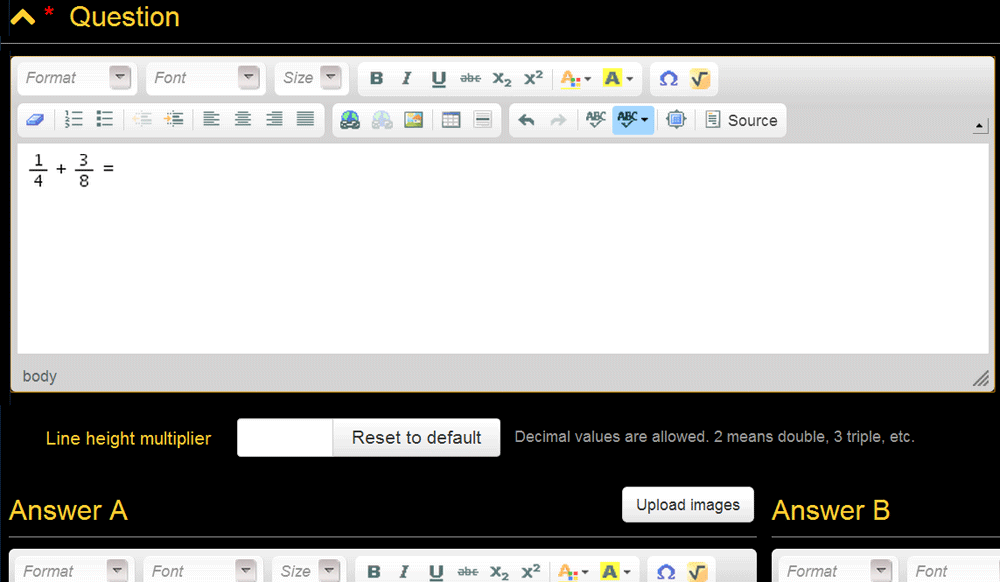
Please note that if you are cutting/copying text or images into the "Question" interface, be sure to use the "Eraser" icon to remove unwanted formatting script that may come with the pasted item. To do so, simply highlight the item brought in and click the icon.
10.Once done linking standards and entering the question/answers, click the “Save & Close” button. The “Create Assessment” screen will refresh and the new question — including the correct answer and any linked standards — will show up.
11.This process should be repeated until all of the questions are written