 Save as PDF
How to Use the Flex Rubric Tool
The process of creating a performance-based rubric assessment in eDoctrina begins when an assessment is built. To begin click on the “Assessments” button on the home screen.
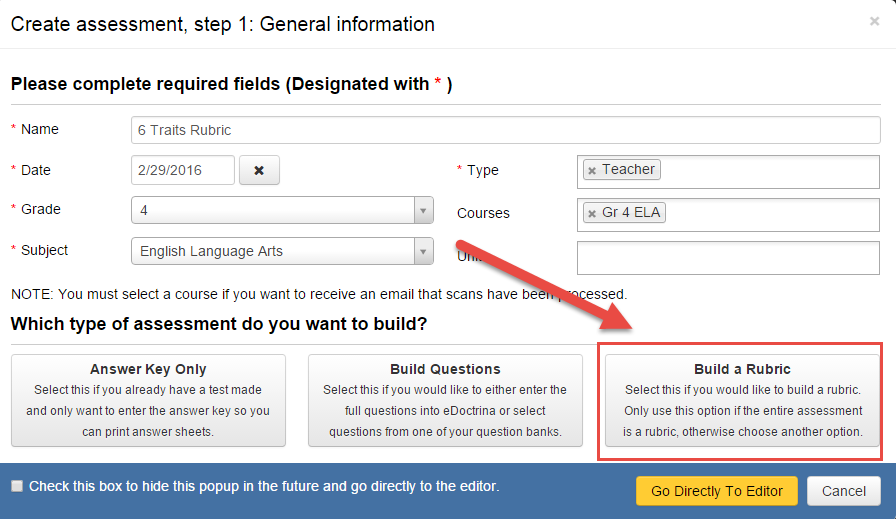
To create a new rubric, click on the “Insert” button on the “Assessments” screen. You will get this pop-up; fill in the general information and select "Build a Rubric". Note: Select this option if your entire assessment is a rubric. If your test has a mix of question types, it's best to select a different option first.
You will get an additional pop-up that asks you to identify the number of categories in your rubric, as well as their number of values. (i.e. In this case, it's out of four points.) Before continuing, users should think about the final product and how it will appear on the FLeX Rubric answer sheet/or Teacher Completed Screen. For example, to create a writing rubric that has six criteria on which students will be assessed (Ideas, Organization, Sentence Fluency, Voice, Word Choice and Conventions), six categories need to be added.

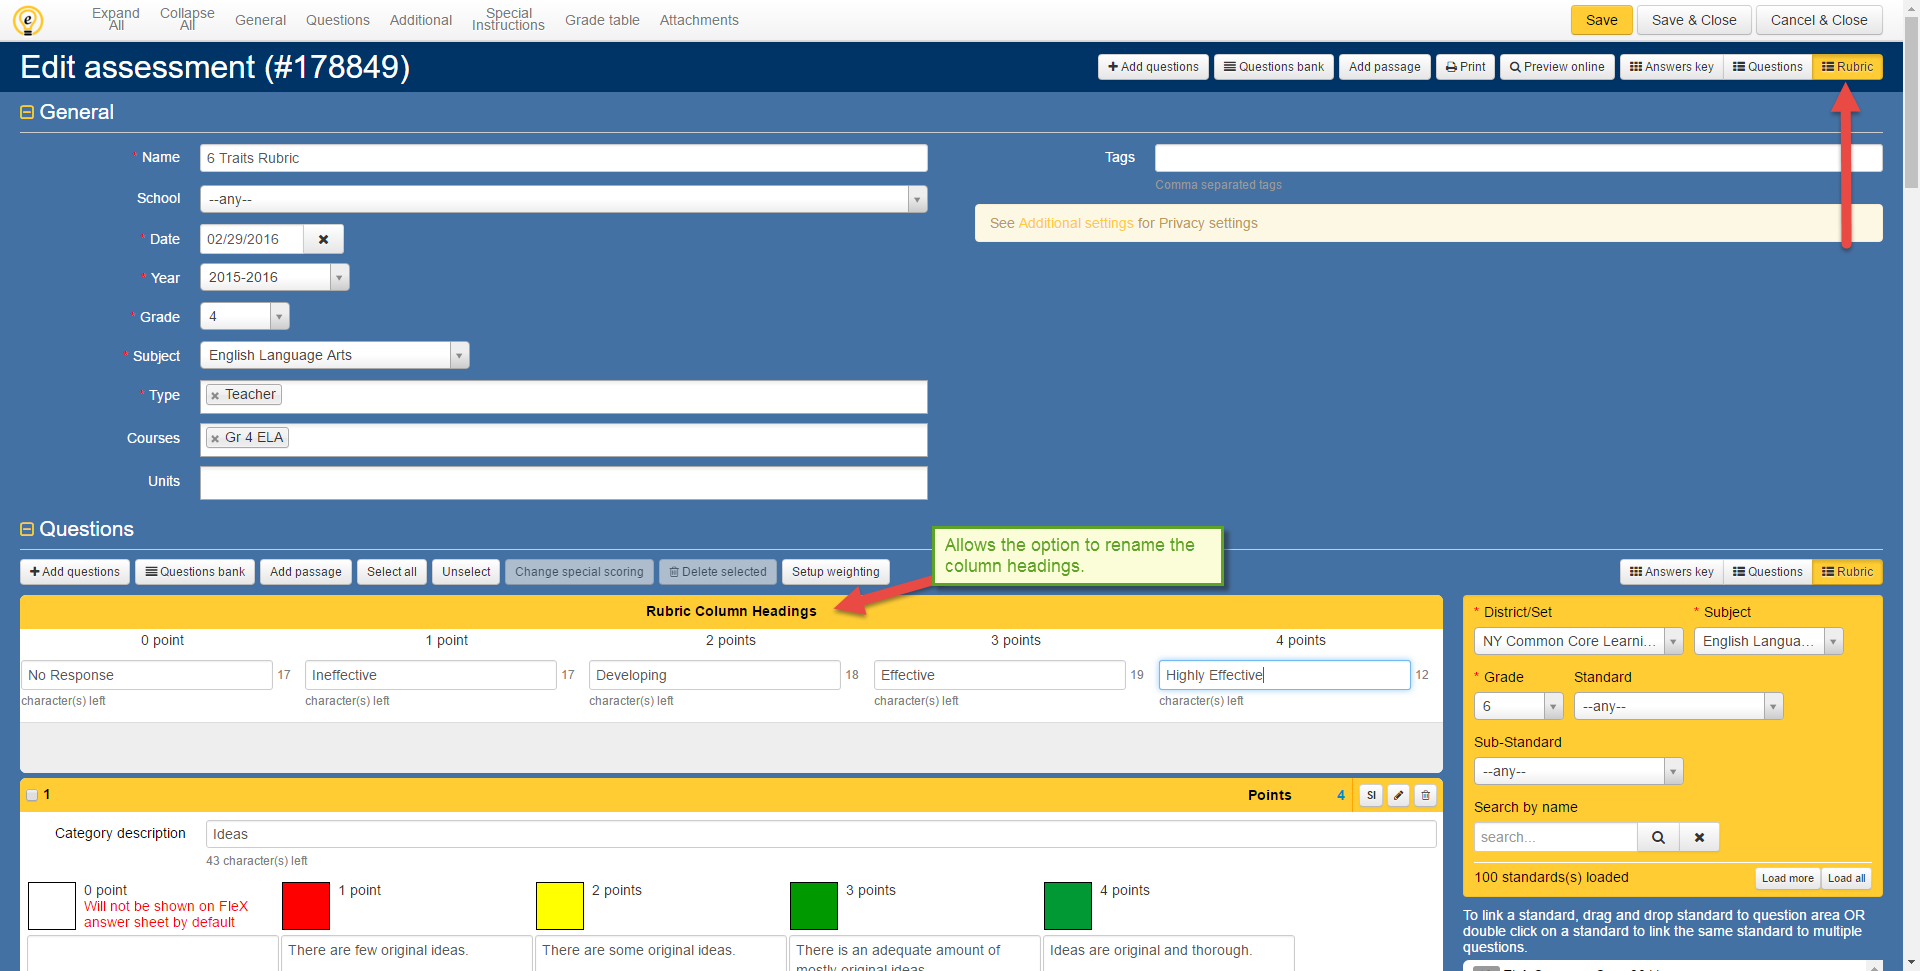
When you click "Create Assessment", you will go immediately to the Assessment Editory where the information you've already entered will have transferred. You will be in the "Rubric" view. Note that each category will now be a question.
You will now be given an option to change the column headings to whatever text you would like.
Please note that due to space constrictions you will be limited to using 28 characters in these boxes:
 Please also note if you would like each column heading to default to the number of points there will be no need to enter text into each box.

Enter the name/description of this category in the "Category Description" box. Then add the rubric text that aligns to each point value. You may also color-code each level by clicking in the box next to the point value as shown. These colors will show up when reports are run to reflect rubric text.
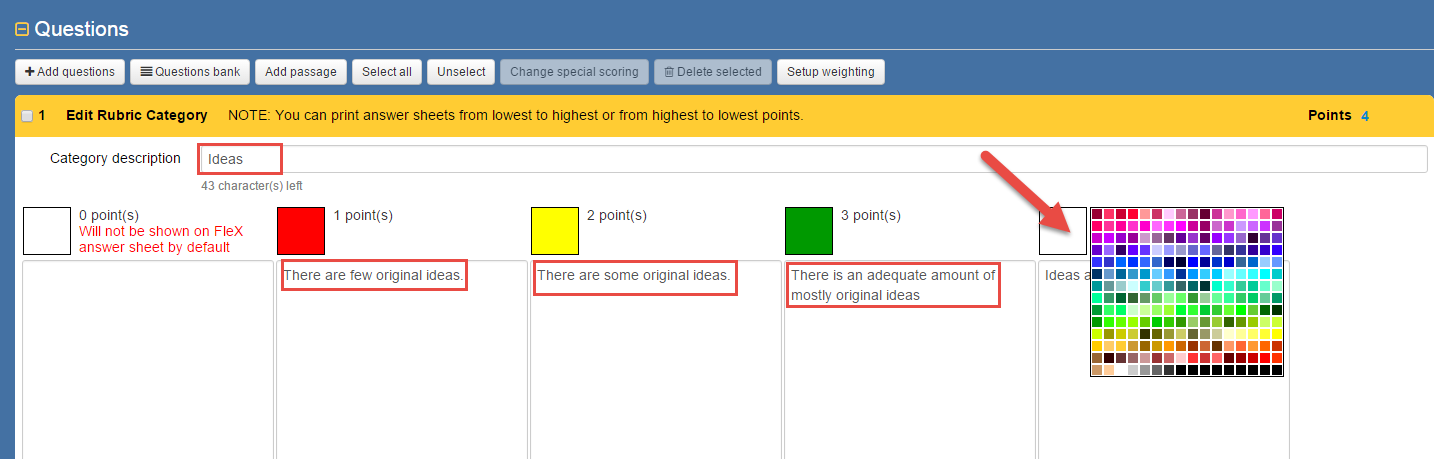
When selecting a color you will be given the opportunity to choose the same color for each level in a category. For Example if green is selected in the 4 Points box all other 4 point categories will be pre-set to the same green chosen. When selecting the color a pop-up will open asking if you would like to do this:

Repeat this step for all categories and, when finished, click “Save.”*
Continue to set up the assessment as you would any other — link standards and set !up a grade conversion table (if applicable). When finished, click “Save” or “Save and Close.”
Collecting Data
There are two primary ways to collect data for performance-based rubric assessments: FLeX Rubric Answer Sheets or direct data entry using the Teacher Completed Screen.
FLeX Rubric Answer Sheets: To print the FLeX Rubric answer sheets, click on the “Answer Sheets” button from the home screen or navigate to Assessments > Answer Sheets from the menu bar at the top of the screen. See How To Guide #15 for more information on printing answer sheets OR click on this link to be directed to the page: http://docs.edoctrina.org/document/a8704f59337dc3de0e8c1540139495a2.html
Be sure to select “FLeX Rubric” answer sheet type! *The teacher will bubble in a score for each rubric category. If you do not select "Include 0 pts.", the answer sheet by default will not print a scoring box to give the student 0 points for a category. (If a student earns 0 points for a category, you would not bubble in a score for the category and scan the answer sheets with the category as blank/unscored and it will register as a grade of zero.)

There is also an option to print answer sheets to include a zero point value. To include a score of 0, check the "Include 0 pts" checkbox below the rubric type selected.

Teacher Completed Screen For more information please reference How To Guide #37: Teacher Completed Screen OR click on this link to be taken directly to the page: http://docs.edoctrina.org/document/86c0c7d9298a3cc0085caec12a605e99dc46fbf8.html
Rubric data for performance-based assessments can be entered directly into eDoctrina using the Teacher Completed screen and the data reports are available immediately.
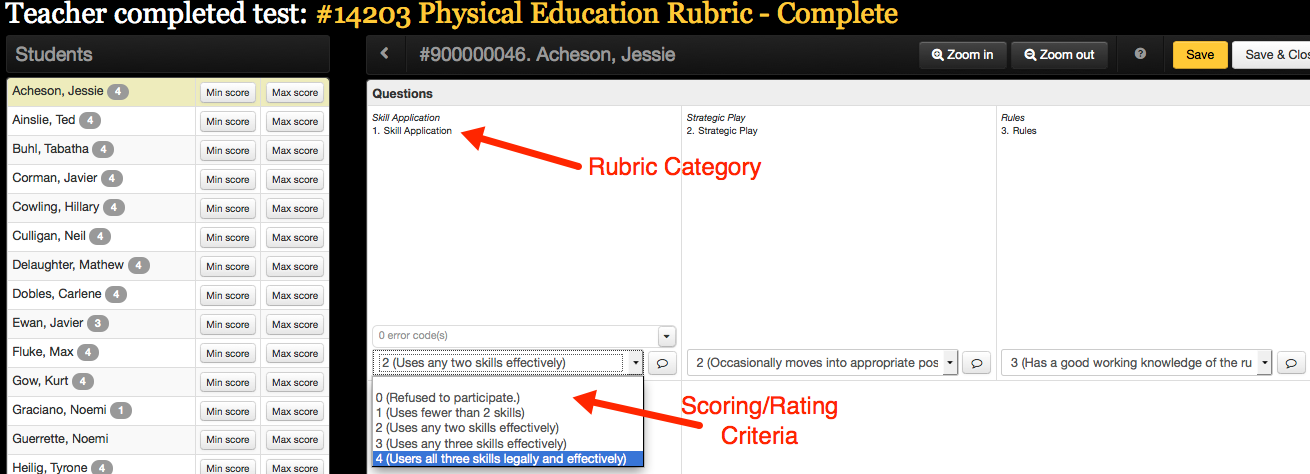
The picture below demonstrates how the rubric can be used in the teacher completed screen.
